

How To Add A Row To A Table In Word
MS Discussion table is a valuable tool to present multiple fields of related data. Information technology makes your text and numbers more readable within the main content. When working with tables, you'll come beyond a situation wherein you'll want to add together a row or two in information technology. Learning to do that proves to be a useful skill for several reasons.
Fortunately, we've figured out more one way to hands add together rows in a table in Word.
At present, there are about three ways to add rows in a table in MS Word.
iii Ways to Add Rows in a Table in Word
- Using the Tab fundamental
- Using the Insert Beneath or Insert Above buttons
- Using the Context Menu
Having said that, here's everything you demand to know to add rows in a table in MS Word.
Method 1: Adding Rows Using the Tab key
This is a direct method of adding rows to your table. You lot've probably been using the Tab key to motility your cursor from 1 cell to the side by side. In this arroyo, we'll accept advantage of that feature to apace generate new rows with a unmarried keyboard key. This method is the most convenient to employ. On the downside, you can only add rows at the stop of your table.
Here are the steps to add rows to a tabular array using the Tab key.
Step 1: Open up your Discussion certificate.
Beginning, open up the document y'all want to add together rows in a table. You lot can either use your own personal document or create a new blank i. Don't worry about messing upward your file because the following steps should not alter whatever of your content. Remember to hit the CTRL + Z keys to revert changes.

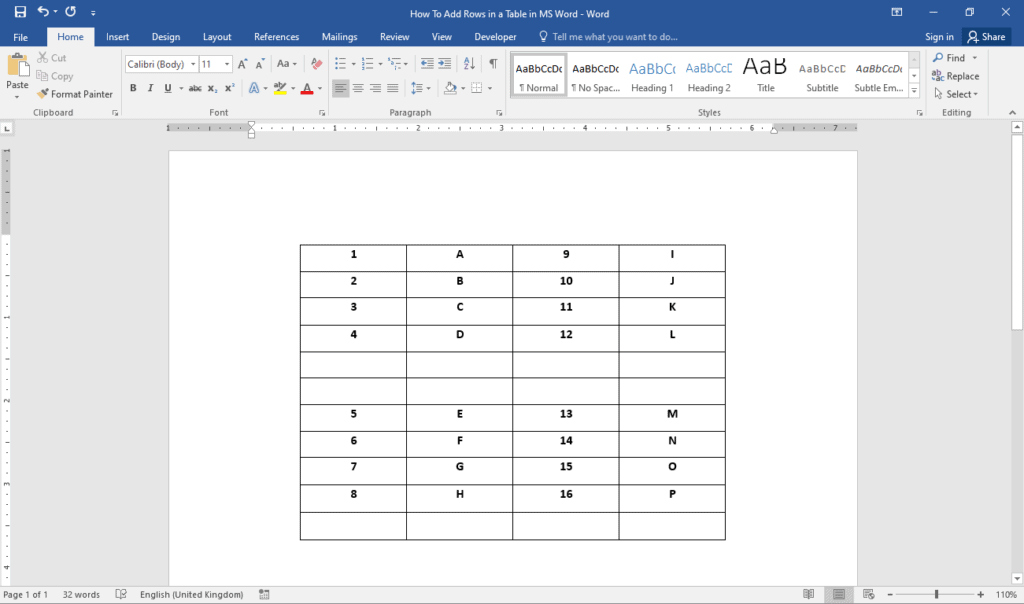
Step two: Click the last cell.
Once your certificate is prepare, move your cursor to the lesser right prison cell of your tabular array. And then, press the Tab key on your keyboard. This will create a blank row at the bottom of your table.
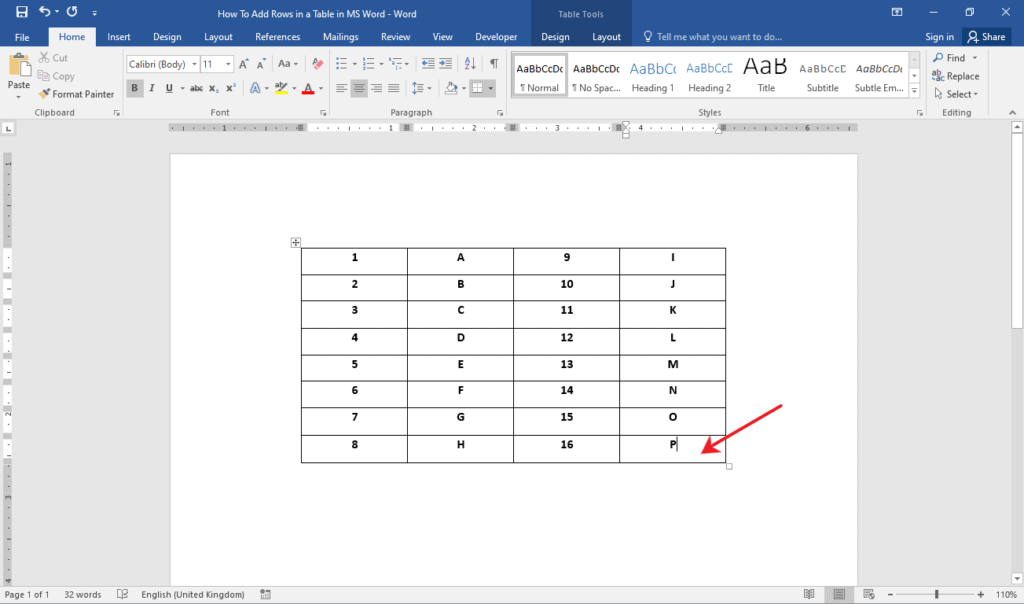
If you need to add more rows, you lot can simply press the Tab key repeatedly until you have the right number of rows you need.
There you have information technology! You lot've just added rows to a table using the Tab key.
Method two: Add Rows Using the Insert Below or Insert Above Options
This second method of adding rows to a tabular array is by using buttons provided for that specific task. MS Discussion offers 2 buttons to add rows. One to insert above the current row, and another to insert a row beneath it. The advantage of this method is that y'all can add rows anywhere in your table.
With that existence said, here's how yous can access the Insert Above and Insert Below buttons in two uncomplicated steps.
Stride one: Open your Word document.
First of all, open up up your MS Word certificate. If y'all have one already open, then y'all tin can start with that. Otherwise, yous can create a new 1 merely make certain there's a tabular array in it. With this, nosotros're already halfway through.
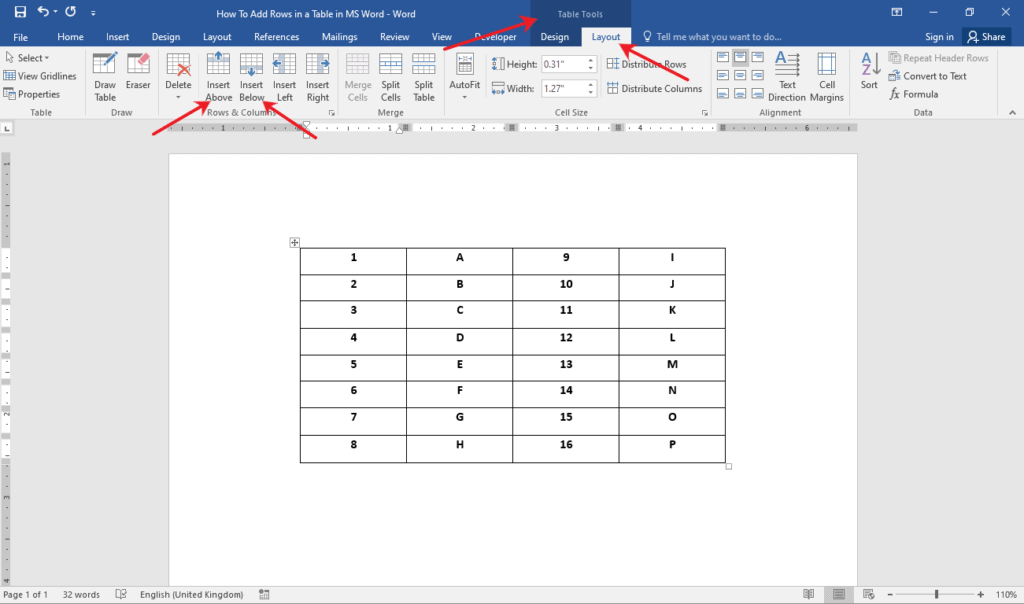
Footstep 2: Access the Insert Higher up and Insert Below options.
On your table, click the row where you lot desire additional rows inserted. Get to the Table Tools category and click the Layout tab. Then, nether the Rows & Columns group, click either the Insert Higher up or Insert Below options to add a new row.
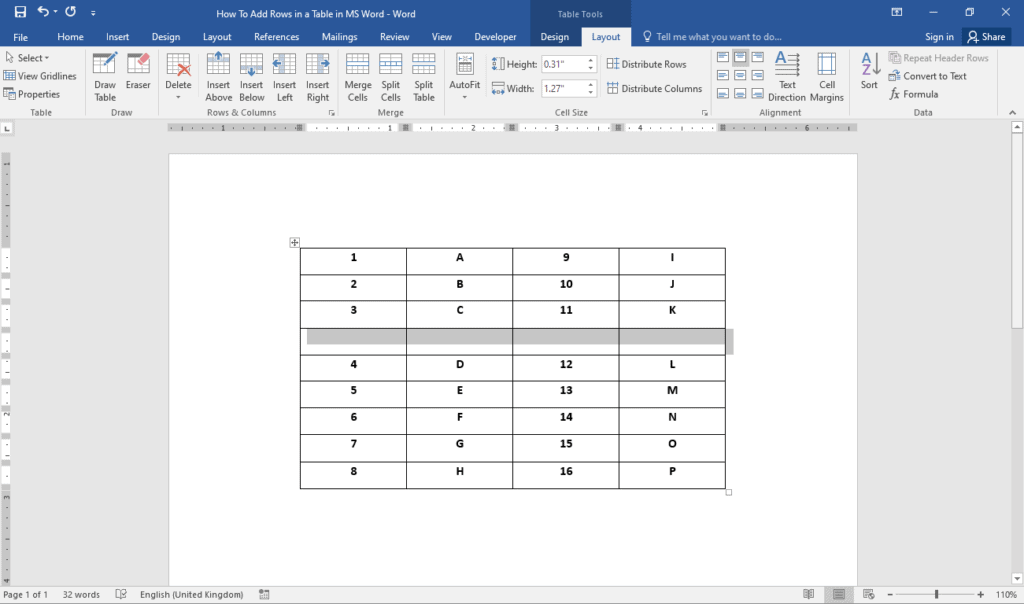
For this case, nosotros'll add together a row higher up the 4th row.
This is what we got.
Excellent! That's how yous add a row in a table using the Insert In a higher place and Insert Below options.
Method 3: Add Rows Using the Context Menu
In this method, nosotros'll prove the steps on how to access the Context Carte to hands add together rows in your table. The Context Bill of fare is a convenient tool to access the about usually used formatting functions in MS Word. It constantly changes the card items as you select text, pictures, tables and other objects.
Here are the steps to access the Context Card.
Pace one: Open your MS Give-and-take document.
Before annihilation else, go alee and open up your MS Discussion document. Feel free to create a new one. Otherwise, employ an existing document if you already take one prepared. Either way, make sure there's a table in your document.

Step 2: Admission the Context Menu.
Click the row where you want to add a new row. Right-click on information technology and click the Insert horizontal drop-down carte du jour. So, select either Insert Rows Higher up or Insert Rows Below depending on your need.
For this example, we'll add a row below the quaternary row.
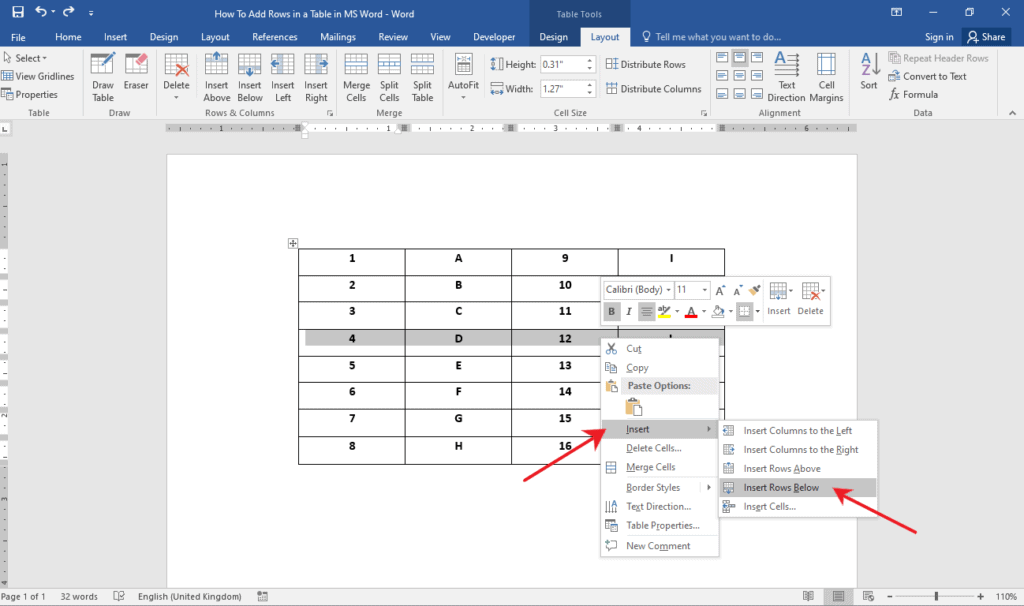
If y'all demand to add more than rows, simply press the F4 key on your keyboard. Annotation that this only works when the F4 central is pressed right after the addition of rows.
Congratulations on adding rows in MS Word using the Context Menu!
Deleting Rows in a Table in Word
If you happen to exist in a situation where yous need to delete rows in your table, we got you. In this department, we'll bear witness you the steps on how to delete table rows when the Undo button just won't cutting information technology.
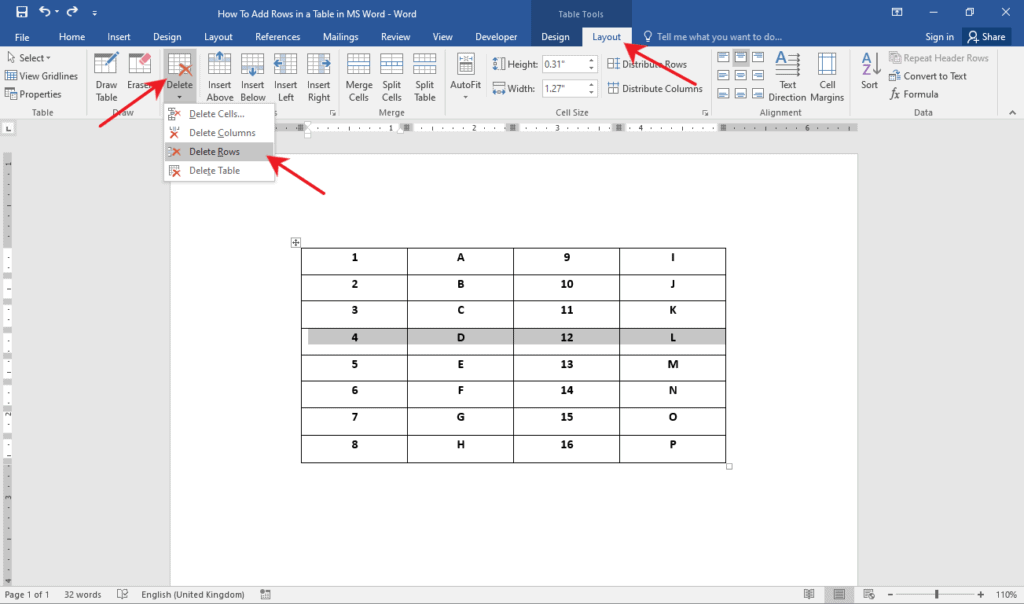
To delete table rows, simply highlight the rows that you lot want to delete. Then, under the Table Tools category, select the Layout tab. Afterwards that, click the Delete drop-down button and select Delete Rows.
Conclusion
Well washed! Y'all've finally arrived at the end of this article. We hope we guided you well on how to add rows in a table in MS Word. Earlier you get, allow united states to requite you a quick summary of what nosotros discussed today.
In this guide, we presented 3 different methods to add rows in a table in MS Word. One technique utilizes the Tab key to quickly add rows at the bottom of the table. Another makes utilize of specific buttons provided by MS Word. The last 1 employs the Context menu to admission both the Insert Rows Higher up and the Insert Rows Below options.
We hope you've found this commodity helpful!

How To Add A Row To A Table In Word,
Source: https://officebeginner.com/msword/how-to-add-rows-in-a-table-in-word/
Posted by: vujume1956.blogspot.com
0 Response to "How To Add A Row To A Table In Word"
Post a Comment